If you want a homemade pizza that doesn’t involve any kneading, special flour, or a long wait period (since who among us has ever said, “What I really crave is pizza that will be ready in 1 to 3 days from now”), you should make more pan pizzas at home. You could even think it’s a worthwhile addition to your 2026 culinary bucket list.
They’re actually impossible to mess up, as they avoid the typical pitfalls that plague most handmade pizza attempts. Not only is there no need to knead the dough, but you can layer it with any toppings you want and it will never sog or flop in the center. You don’t have to keep an eye on the oven or risk getting something that tastes more like a cracker than a pizza – it bakes at a high temperature for 30 minutes and will forgive you if you take it out a bit later. You don’t need a fancy pizza oven; even the most basic one in my flat does the job well.
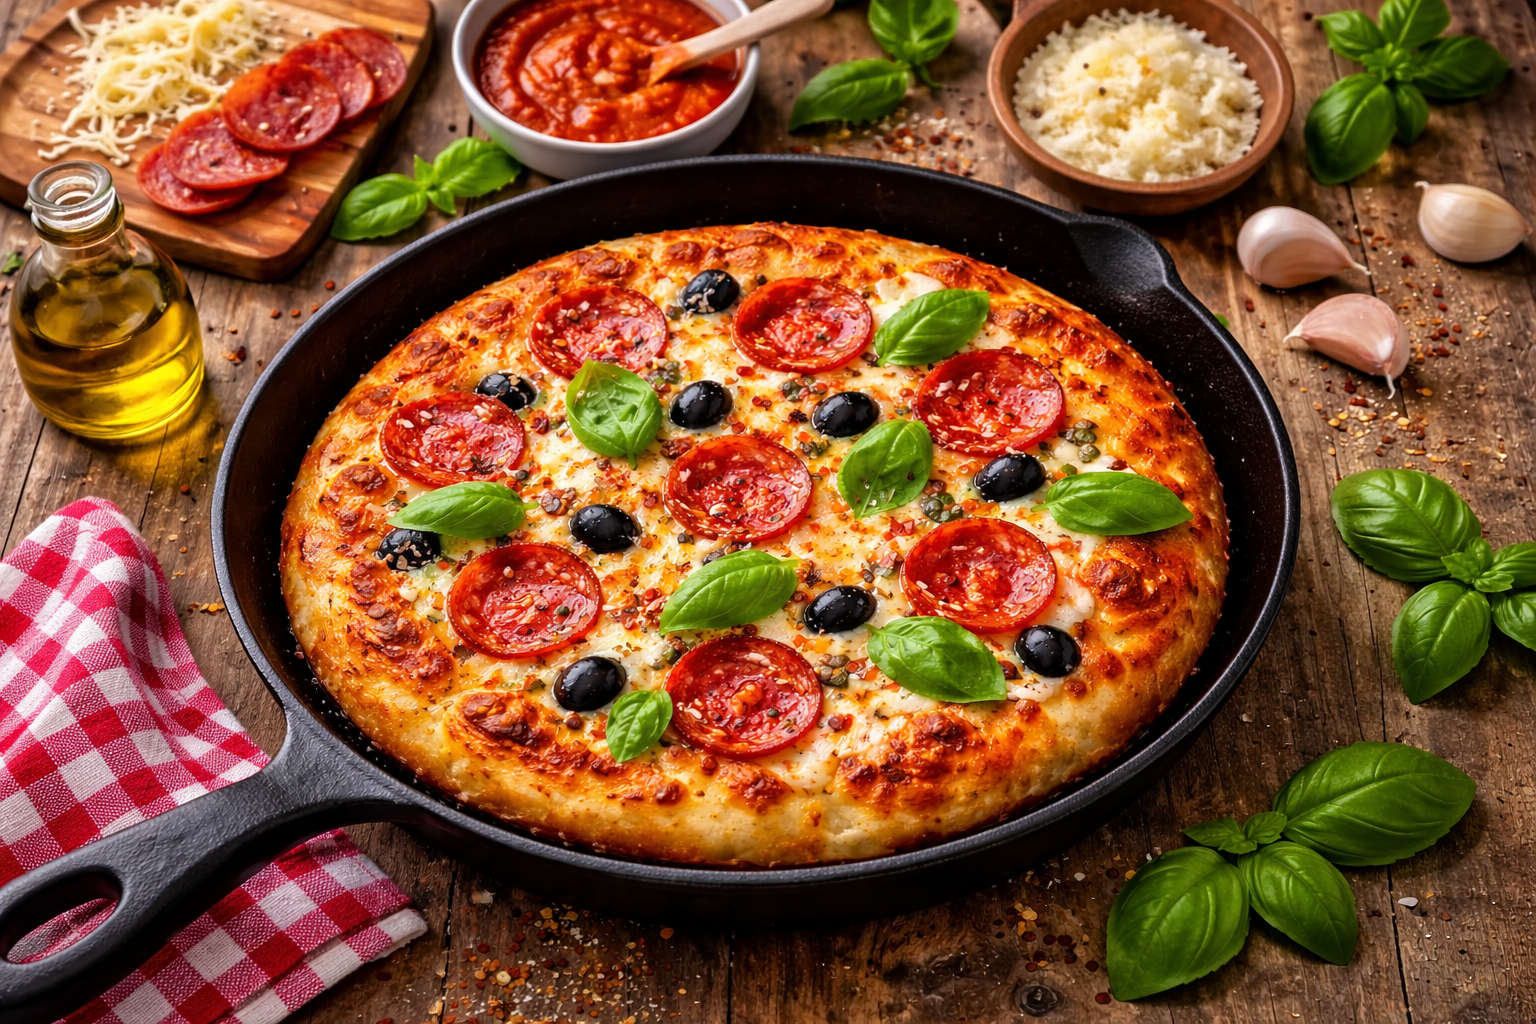
But the texture of the pizza tastes like something you worked much harder for — a thick, airy dough, pillowy and rippled with blistered cheese and toppings that extend all the way to the toasted cheese edges (one of my favorite parts), and browned to a seasoned crouton-like crisp underneath, the kind that makes an audible crunch when you cut through it.
The pizza is seen below in its most basic form: sauce, two types of cheese, and a little basil on top, as approved by the family’s buttered noodle contingent (just joking; she will eat the basil). But toppings are simple to add. I sometimes roast some while the oven preheats (thickly sliced mushrooms, diced onions, peppers, and so on); others can be sliced thin and heaped on shortly before baking (for example, pepperoni or fresh vegetables). Be generous with the toppings; they will not weigh the pizza down.
This is the pan pizza dough used in the Spinach and Artichoke Pan Pizza, the Pizza with Broccoli Rabe and Roasted Onions, and the Angry Grandma Pizza (in Smitten Kitchen Keepers), but as I made it for dinner last week for the millionth time, I realized that the site lacked this family favorite with no bells and whistles.
Make the dough. In a large bowl, combine the flour, yeast, and salt. Mix in the water and 1 tablespoon olive oil with a spoon or dough whisk, swirling a few times to ensure there are no unmixed flour pockets. Cover the bowl with plastic wrap and let rise until it doubles in size and moves a lot when jiggled, which should take about 1 1/2 to 2 hours at room temperature. If you won’t need the dough right away, you may put it in the fridge before it’s fully doubled and let it rest for a few hours or even overnight.
Assemble the pizza: Preheat your oven to 450°F/230°C. Coat a 12-inch (30-cm) round cast-iron skillet in 3 tablespoons olive oil. Scrape the dough into the pan and turn it over once to grease both sides. Dip your fingers in oil to cover them, then dimple the dough out to the edges as much as you can; it’s fine if it doesn’t fully stretch at this point. Set aside for 30 minutes, loosely covered, to finish proofing.
To assemble: Spread the sauce generously over the dough, reaching all the way to the edges of the pan. Sprinkle mozzarella, then pecorino or parmesan. Season to taste with salt, pepper flakes, and oregano, then drizzle with a final tablespoon of oil before baking.
Bake the pizza: Bake for 30 minutes, until the edges are deeply golden brown and the top is toasted. Yes, the baking time and temperature are right. It sounds like a long time, but I’ve made a hundred of these pizzas and always regret taking them out before 30 minutes since the edges are less satisfyingly crunchy.
To serve: Scatter with fresh basil. You can serve it directly from the pan, but I prefer to protect my knife. Remove the pizza from the pan and transfer it to a cutting board before cutting it into wedges.
Do ahead:Leftovers reheat superbly. I reheat leftover slices on a foil-lined sheet pan at 350°F or 375°F for 5 to 10 minutes.


 How to make Simple Crispy Pan Pizza


No Comments