Friends, it is snickerdoodle season. If you didn’t know there was a season for snickerdoodles, let me paint a picture for you: you’re coming inside on a blustery and colder-than-expected October day, so you hadn’t dressed for it, and you can’t wait to announce what my kids always laugh at me for saying when I walk through the door: “Well, that’s enough doing things for me today!” I swear off “being outside” and “hard pants” for the rest of the evening, but what is this! What is this god-like aroma of buttery baked cinnamon sugar warmth that has filled your senses? Is it a scented candle, i.e. the concept but not the substance of something you enjoy? No, they’re snickerdoodles. You are going to consume a warm one, which feels like climbing inside. It’s The Great Pumpkin, Charlie Brown, while also having the opportunity to be this dog. I’m not saying you can’t experience sensory transcendence in January or June, but it’s on a different, worldview-shifting level when chilly air is still a novelty.
In 2009, exactly one day before my first child was born, I provided a recipe for classic snickerdoodles, the old-fashioned sort with cream of tartar and baking soda instead of baking powder, that cool to flatten somewhat and have crisp edges. They’re delicious, contest-winning, and will remain in the archives precisely as they are. But, as I bit into them a few weeks ago, a vision crystallized in my imagination of what they’d be if they were, say, the mic drop of the snickerdoodle category, seven phrases I’m pretty sure no one has ever had the audacity to string together. A few weeks of fiddling later, they’re here, and I can’t stop talking about them. A few factors distinguish them:
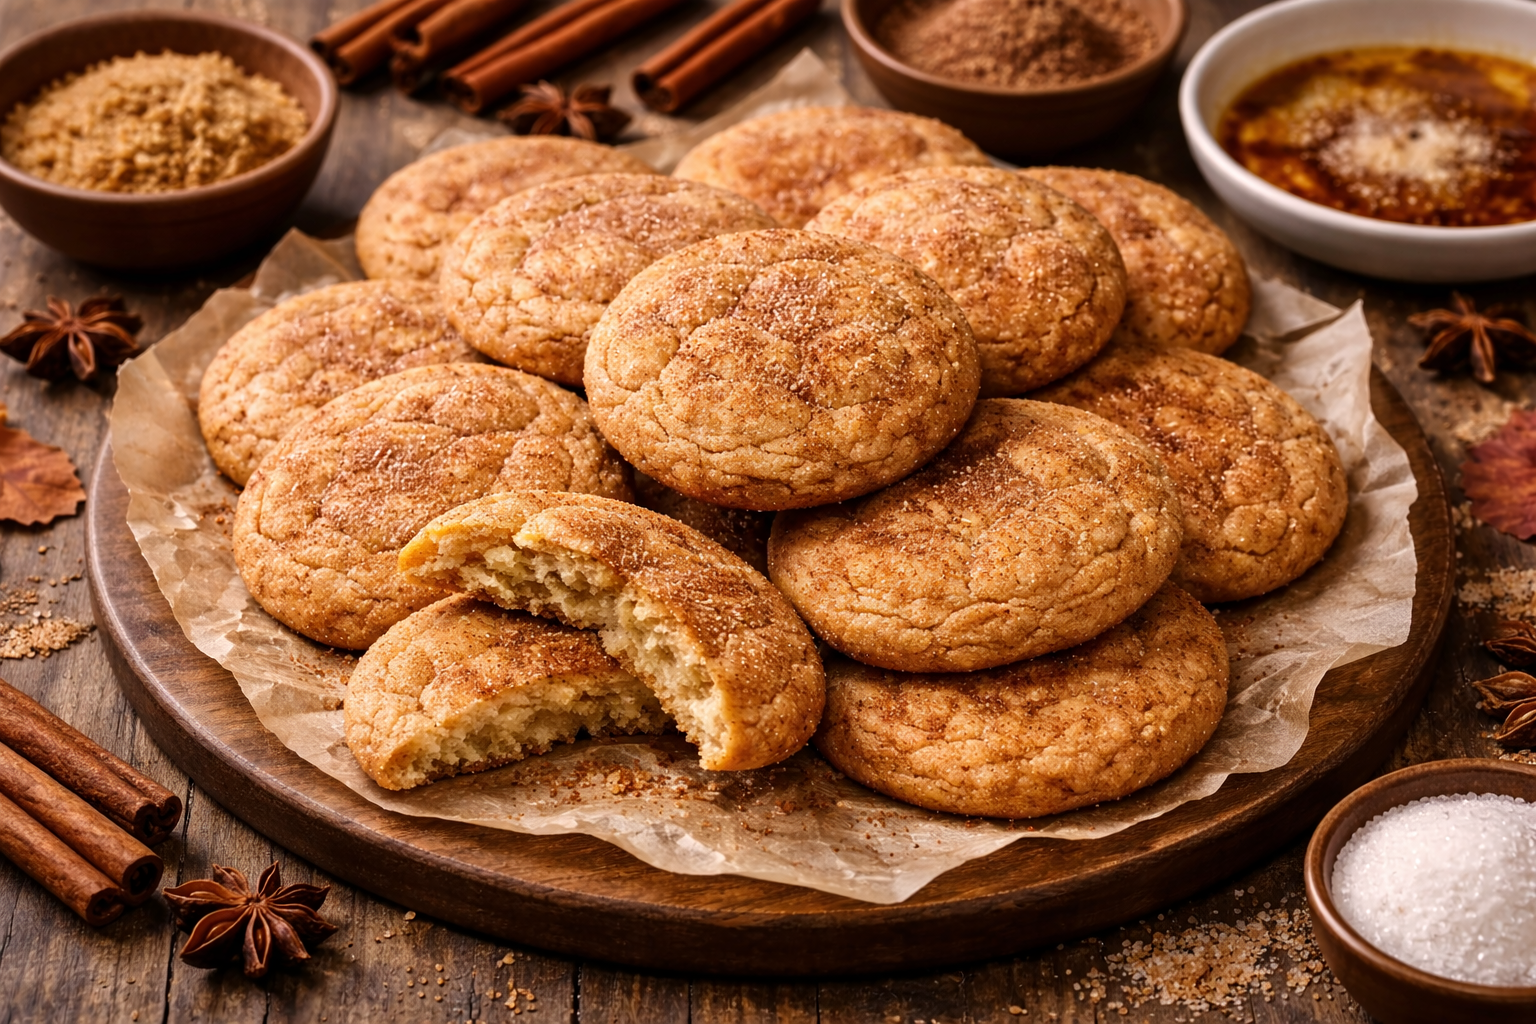
Thicker and more tender: They are not cakey, but have a very subtle bite with delicately crunchy edges. They become that way in the same manner as my confetti cookies do: by adding a small amount of cream cheese. This also adds intricacy to a standard drop sugar cookie, which is often tasty but not particularly exciting.
Brown butter: While my love of brown butter is well-documented, I prefer to limit its use to locations where you can truly taste it, which we do.
Vanilla bean: I initially wondered if adding vanilla bean paste would create more of a Pinterest keyword pileup than improve the flavor, but when I tried it, I was extremely incorrect. It’s wonderful here.
My favorite cinnamon: No, it’s not required, but my personal favorite, Burlap & Barrel’s Royal Cinnamon, is a special treat here. Be like Deb and buy it in one-pound bottles. If you have wonderful friends, please share it with them.
This is my lifelong snickerdoodle recipe, the last one I’ll ever need, and I can’t wait for these to become a staple in your kitchen as well.
1 cup (8 ounces or 225 grams) unsalted butter (see Note)
3 tablespoons (45 grams) water (see Note)
3 cups (400 grams) all-purpose flour
1 1/4 cups (250 grams) granulated sugar + 3 tablespoons (40 grams) for rolling
1 teaspoon baking powder
1/4 teaspoon baking soda
1 1/2 teaspoons kosher salt (Diamond brand, use half of others)
1/4 cup (2 ounces, 55 grams or 1/4 of an 8-ounce brick) cream cheese, in chunks
1 large egg
1 1/2 teaspoons vanilla extract or vanilla bean paste
1 1/2 tablespoons (10 grams) ground cinnamon
Brown your butter: In a medium saucepan, melt the butter over medium-high heat. It will melt, foam, and turn transparent golden, with some toasted speckles appearing. As soon as they do, remove the pan from the heat; the residual heat will be sufficient to toast the remaining butter to a medium brown color. Pour the butter and any toasted flecks you can scrape from the pot into a medium bowl, then slowly add the 3 tablespoons of water. Transfer the bowl to the freezer.
Chill the browned butter: We want to freeze the butter until it’s hard all over, but believe me, this speeds things up. Freeze the butter in the bowl for 30 minutes, then stir thoroughly, scraping down the sides and combining the residual melted bits in the center with the hardened chunks. Return to the freezer for another 15 to 30 minutes; it should be firm throughout. Cut it into pieces right in the bowl. There is no need to make them even.
To make the cookies in a food processor: Place the flour, 1 1/4 cups (250 grams) sugar, baking powder, baking soda, and salt in the work bowl of your food processor and pulse to mix. Pulse and incorporate in the cold brown butter chunks and cream cheese until the mixture resembles breadcrumbs and no visible parts remain. Add the egg and vanilla, and blend until fully combined, scraping down as needed (the dough may appear like rocks), then run the machine for approximately another minute, or until the dough mixture is thick and smooth.
To make with an electric mixer: Mix the flour, baking powder, baking soda, and salt in a mixing bowl until well blended. In a large mixing bowl or the bowl of a stand mixer, whisk together cream cheese, cold brown butter, and 1 1/4 cups (250 grams) sugar until foamy. Add the egg and vanilla, and mix again, scraping the bowl as needed. Add the flour mixture and beat until it is gone. In some cases, dough made using this method will be too soft to roll into balls in your hands; if this happens, chill it in the fridge for about 20 minutes before using.
Heat oven: To 375°F (190°C)
Finish the cookies: Line two big baking pans with parchment paper. In a separate bowl, combine the remaining 3 tablespoons (40 grams) of granulated sugar and all of the cinnamon. Scoop cookie dough into 1.5-tablespoon-sized balls (I’m using a #40 scoop), smooth them with your hands, and then roll them in the cinnamon sugar mixture before transferring to the prepared baking sheet. Use your fingers to softly flatten each dough ball (seen 1/3 of the way). Repeat with the remaining cookies, spaced two inches apart.
Bake cookies: For 10 to 11 minutes. They will still feel soft and underbaked on top, but they will firm up as they cool, promise. Allow the cookies to remain on the baking sheet for 2 minutes before transferring them to a rack to finish cooling.
Basic butter: I’m looking for ordinary, non-European, regular butterfat butter — the kind that comes in a 1-pound box with four “sticks” at most American grocery stores; retail brands will suffice. [If you wish to use a nicer, higher-butterfat butter, use less water after browning it.
Why the water: When you brown butter, the water content cooks off (which generates all of the sputtering in the pan), and we want to bring it back in to ensure that the cookies have the correct soft texture. I used to quantify water loss by volume and would recommend adding about 1 1/2 to 2 teaspoons of water back for every 1 cup of butter. But I recently started weighing my brown butter and was astonished to see that what started out as 227 grams of butter became 186 grams after browning (i.e. minus 41 grams), thus you’d need to put 2 tablespoons plus 2 teaspoons of water (40 grams) back. However, I discovered that these cookies had the best texture when I added 3 full tablespoons (45 grams) of water, as specified here. Was that incredibly nerdy? Yes. But I knew someone would ask!
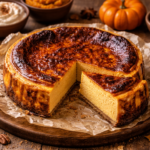


 Brown Butter Snickerdoodles


No Comments